Mudpies & More- making the most of childhood

logo-17

Mrs. Pea’s Perspective has expanded! Please join me on this parenting adventure over at Mudpies & More.  This is a site for me to share all the great resources I have picked up over the past 3 years, as well as the many more I will pick up along the way.  Not mention all the great adventures Doug and I will share.  Hope to see you there!


Halfway there!!!

20 Weeks

I’m 20 weeks pregnant today, halfway there already!  So far the time has flown by and my little man is growing like a weed.  Yes, my little pea is a BOY!!  The first trimester was a bit rough, but the second so far has been wonderful.  We’re really looking forward to meeting our bundle of joy in October.

In the meantime I have started planning away.  The baby will be staying in our room for a while, so I am not doing a nursery.  He will have a nice nook in our bay window with lots and lots of cute things.  My creative energy is spent redoing our guest bath for the little tyke.  We are currently striping the wallpaper out of there and then we can paint.  My plan is to do a sea creatures theme for the bathroom.

I found this beautiful wall color, called rainwashed (pictured below).  My bathroom tile is about the same color and the trim is white as well.  There isn’t a window in my bathroom so this will really brighten the room up.

rainwashed

Next I will fill it full of sweet touches, that I will either buy or make depending on my energy levels.

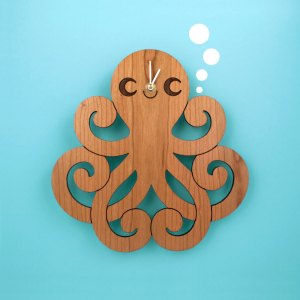
Octopus Clock

Found on Etsy, here

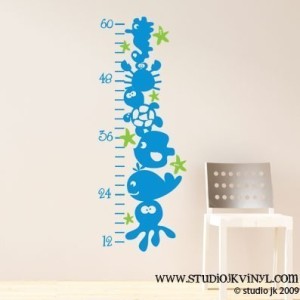
Growth Chart

Found on Etsy, here

And finally for even more fun, this pirate collection from Macy’s.  We’ll see who enjoys this fanciful bathroom more, my little babe or my guests!  Either way the theme items can be removed when we are ready to sell the house or simply redecorate.  I will keep you posted as progress is made.

A Pea in the Pod

You know when you have a secret SO big and SO good that all you want to do is talk about it, so instead you just stop talking… well that’s what has happened to me.  Today however, I get to share!

There is a PEA in this pod!!! 

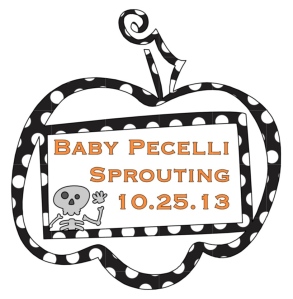
Baby Announcement

Told you it was a good secret!  We are beyond excited to be expecting our first child this fall.  I only wish I knew the gender NOW.  I have so many ideas swirling around in my head for nursery projects, but I can’t start anything until I know which gender I will be welcoming home.  Of course my energy level is WAY down right now anyways.  My afternoons are typically spent napping these days and the rest of the time I’ve been a little green.  In just a couple more weeks I will be past the first trimester slump, and into the superwoman phase of the second trimester (or so I’ve been told).

In the meantime, stay tuned for more updates!


Illustration 101

Along with the new year resolution to take better care of my health, I signed up for a class, Illustration, an Introduction at the School of Museum of Fine Arts here in Boston.  I love living in a city where all sorts of colleges and universities offer continuing education classes and certificate programs!  The SMFA offers a certificate program in Illustration that I am interested in, and this introductory class seemed like the perfect way to test the waters before committing.

I love walking into an art school and knowing I belong there!  I love that this class is getting me to be creative outside of my Etsy shop realm.  My professor is a little cooky (as to be expected from an Art school prof.) but he’s gotten everyone out of a judgmental frame of mind and into creating like a child again.  It is awesome to see how many varied approaches there are to the assignments; we all start with the same information but we all come back with a wild array of responses.  If there is criticism in the classroom, it is coming from ourselves and focused on our own work.  My professor always counters that criticism with a “NO it’s cool”, or “You got it.”  Then he tells you about an artist you should look up that works in a similar way.  It is very accepting and sets a nice tone for the whole class.

There are students in the class that have never taken an art class before and others who are very experienced, so it’s a nice mix.  The homework assignments range from technique exercises to full on editorialized illustrations in mediums you might not have worked with before.  It is wonderful to be encouraged to try new things without the result being criticized.

On top of all of this, my student ID now gets me into all of Boston’s top Art Museums for free this semester!  I am looking forward to exploring the new additions at the Museum of Fine Arts as well as the Isabella Stewart Gardner Museum this spring.

Now enough talking, here is some of my work for the class so far:

Copy of a Seurat Drawing Plate, pencil

Copy of a Seurat Drawing Plate, pencil

Copy of a Seurat Drawing Plate, pencil

Copy of a Seurat Drawing Plate, pencil

Loneliness, Bad Childhood Memory, cut paper

Loneliness, Bad Childhood Memory, cut paper

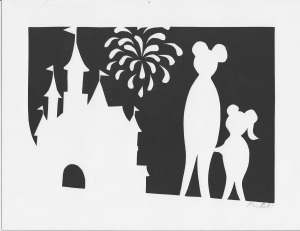
Disney World, Good Childhood Memory, cut paper

Disney World, Good Childhood Memory, cut paper

These are a couple of examples of both the technique exercises, and the original work assignments.  The Seurat copy plates taught us about the use of tone and background to enliven the subject.  The cut paper illustrations was an assignment to illustrate a good and a bad childhood memory in any medium we’d like.  I wanted to play off the positive and negative so I chose to work only with black and white.  Being the only one working with cut paper really got people’s attention, so I hope some of my classmates might try it out too.

We’ve only met three times so far, but I promise to share my work as the class progresses.  One of my next assignments has us working with clayboard, a medium I have never used.  It should be interesting.  In the meantime, have a good week!


New Year, New Goals

Hi All!  First of all let me apologize for posting a giveaway and then disappearing.  I bit off more than I could chew over the holidays and Mrs. Pea’s first giveaway fell through the cracks. 😦  However, if Roberta Decker and Emily over at The Waiting are still interested in receiving their snowflakes please send me your mailing addresses through private email on my Facebook or Etsy page.

Now on to the new year!  I hope you all had wonderful holidays and have all recuperated from them by now.  This year I resolved to take control of my health.  **Warning the rest of this post is about digestion issues**

For most of my life I have suffered from what my husband and I call “bad tummy” issues; the rest of the world knows it as irritable bowel syndrome or IBS.  This not only affects my digestion but also my energy levels and moods.  It is a functional disorder but none the less painful and embarrassing.  Over the summer my doctors found I had H. Pylori, a common gut bacteria that can cause peptic ulcers, I really hoped that going through all the antibiotic treatments would help my “bad tummy” but in fact it has made it worse.

Well, this is the year I take the reins and make my bad tummy better!  I found a book called IBS: Free at Last! and it really has changed my life already.  The author, Patsy Catsos, explains what is happening in the digestive process that causes IBS flare ups, and outlines how this new diet out of Australia works to control it.   The low-FODMAP diet works by eliminating or at least limiting certain carbs, found in every type of food from veggies to sugar-free additives, that are poorly digested and quickly fermented in the gut.  To quote wikipedia,

FODMAPs are short chain carbohydrates and monosaccharides which are poorly absorbed in the small intestine, including fructans, galactans, fructose and polyols. The term is an acronym, deriving from “Fermentable, Oligo-, Di-, Mono-saccharides and Polyols“.

In Patsy’s book she lays out a plan to eliminate all FODMAP heavy foods from your diet for a couple of weeks and then taking a series of challenges in each carb category to figure out which ones you are most sensitive too.   Within days of starting the elimination diet I was back to my old self again.  It has been hard giving up wheat, cheese, garlic, and onions.  My key to success so far is having a meal plan everyday.  This diet is fairly easy to follow if you are cooking your meals at home, but extremely difficult to stick to when eating outside the house.

So far I have made it through two challenge phases: the fructan challenge which includes wheat, garlic and onions, as well as the lactose challenge, I’m certain you all know the term lactose by now.  While it was nice to get a weekend to enjoy wheat and another for ice cream, neither of these challenges ended well for me.  I am hoping the next two will go better, but we will see.

At the end of these challenges I will know what permanent lifestyle changes I will have to make.  The goal of this diet isn’t to cut certain food out of my life for good but to know what to limit in my everyday diet and to recognize ahead of time what is going cause my “bad tummy.”  Having the power to spot a problem food for me is HUGE!

In the coming months I hope to move my cooking section out of this blog and into another one focused more on low-FODMAP living.  I am trying to think of a catchy name for said blog, so please leave suggestions in the comments below!

Happy New Year!
Mrs. Pea’s Giveaway!!

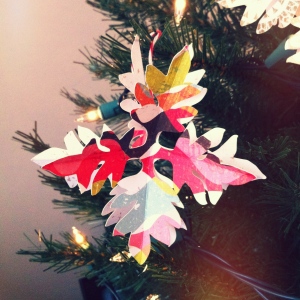
Happy Monday All!  This week Mrs. Pea’s Papers is giving away our Set of 3 Multicolored Snowflake Paper Ornaments to a few lucky folks.  The exact pattern of the paper you receive might differ from the one shown here, but we promise it will be just as cute.IMG_1494

I can’t tell you how great these look on the tree!  They also make great gifts for friends and family.  Here’s what you have to do to win yourself a set!

Follow Mrs. Pea’s Perspectives Blog or Twitter feed, Like us on Facebook, OR give the shop some love by “hearting” it.  That’s it!  In the comment section below tell us what action you took and I will be randomly choosing 3 winners out of a hat.  Contest ends Saturday at noon, so enter your name as many times as you’d like to up your chances of winning!  I will announce the winners Sunday.

Good luck to you all!

What? It Fell Out of the Tree that Way!

Mr. Pea & I bought our Christmas tree on Sunday and ended up with a few extra branches.  The man cutting the fresh ring on the tree had to clip off a few of the low hanging limbs and he was about to throw them into the pile of other discarded branches when I stopped him.  We just paid for those limbs why discard them!  Christmas is the best time of year for a DIY project and those extra branches could make lots of nice decor for your home.

Here’s what “fell” out of my tree:

Christmas Wreath

Christmas Wreath

Christmas Bough Decor

Christmas Bough

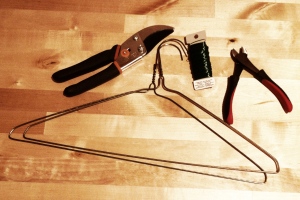
In total I ended up with four of the lowest (and biggest) branches to play with.  Here is all you need to transform your extra branches into beautiful decor: 2 Wire Hangers, Pruning Sheers, Wire Cutters, and Green Wire.  That’s it!

Wreath Making Tools

2 Wire Hangers, Green Wire, Wire Cutters, & Pruning Sheers

The green wire I have shown is 20 gauge and easy to manipulate, floral or other easily bendable wire will also work.  If you have a wire wreath form floating around, omit the wire hangers.  Now, shape the hangers into a rough circle, line up the hooks, and using the green wire secure at the top, bottom, & sides of the circle.  I found it hard to even see the hangers anymore once the wreath was done, but if you’d like wrap the hangers with green floral tape.  Now clip one branch at a time into 10″-12″ lengths and secure to the wreath form you just created with the wire, overlapping the ends of each length.  Continue doing this until the wreath is as full as you’d like.

Now it’s time to decorate!  I had these clip on decorations from my usual grapevine wreath.  I got them at Michaels.  You could spice yours up using ornaments, bows, pine cones, or lights.  Whatever you have around the house or find in the yard even.

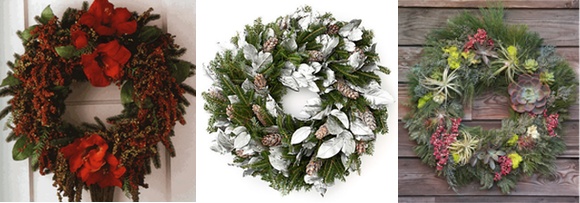
Here are a few inspirational ideas:

  Wreath Ideas

I really love the use of different plants for varying texture in all of these wreaths.  For more tips and how to add live plants to a wreath check out this article on Apartment Therapy.

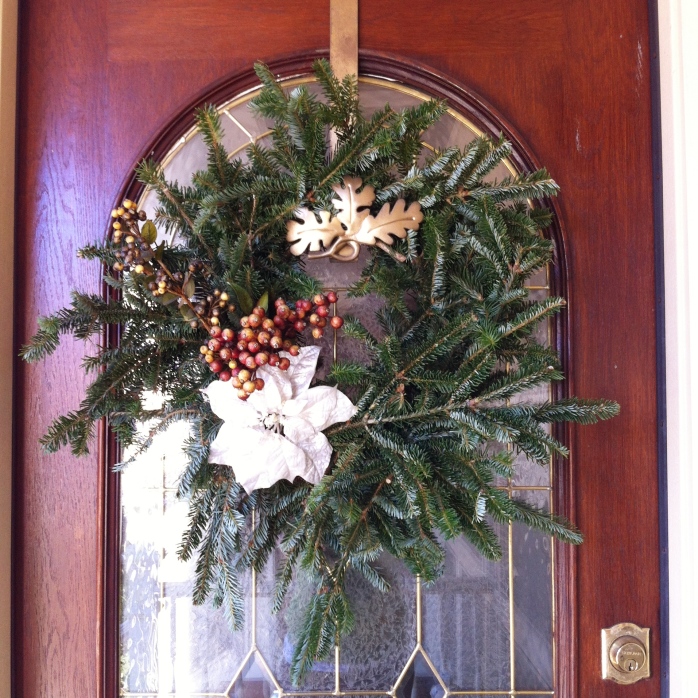
My wreath took less than an hour to put together and I had enough branches left over to put together the bough on my front step.  I couldn’t believe how easy (and cheap) this was to put together!  Literally, this was free!  Now go make something beautiful!

Homemade Fir Wreath


My Work is Making Headlines!

This is a very special weekend for me and my old co-workers at Amaze Design, you see our museum project opened December 1st to great fan fare!  Amaze Design was responsible for 5 out of the 11 galleries at the new Perot Museum of Nature & Science in Dallas, TX.   I was one of the senior exhibit designers mainly developing the designs for the Life Hall, Earth Hall, and Universe Hall.

It is thrilling to see this project open, and even more exciting to see the opening being covered in The New York Times, The Miami Herald, The Chicago Tribune, and of course all the Dallas news media just to name a few!

Discovering Life Hall

This is the photo accompanying the New York Times article, it is over looking the Discovering Life Hall.  😉  It’s a special weekend indeed.


DIY Paper Star Garland

To me Thanksgiving is such a nice primer to usher in the Holiday Season.  Right away you get to start off your Christmas decorating with a clean house (if you hosted), and all the leftover pumpkin pie is yours to nibble on while you dig through your box of goodies.

I like to add at least one new decoration to my holiday collection every year.  It is too expensive to buy it all at once!  This year I made a Paper Star Garland and I’d love to share this cute little DIY decoration with you today.

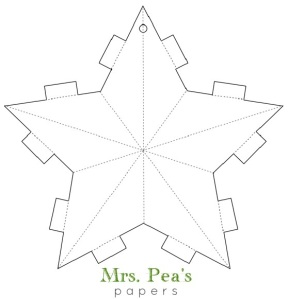
First you’ll need the template!  I cut these out with my Silhouette, but they could easily be cut out by hand.

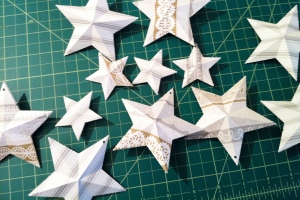
Grab this template and scale it to the size you want.  I used a 4″ star and a 2″ star.  Cut along the solid lines and score along the dotted lines.  Cut out 2 for each finished star and glue them together with the tabs.  Once they’re glued you can push them together to get the 3-d shape.  You should end up with a pile of stars like this.

I made 8 large stars and 4 smaller stars for a 6′ length of garland.  Next measure the length of intended span and add a few inches for slack.  For instance, my window is approximately 5′-6″ so I added another 6″ to allow for a bit of slack in my garland.  Now cut out double that length for the rope or twine, I cut 12′ of twine.  Tie the two loose ends together so you end up with a doubled over 6′ length of twine with a loop on each end.  I hang mine by looping each end over a thumbtack, preferably the same color as your molding or clear to not draw attention to them.

Hang up your twine at this stage to make sure the length is right and make any adjustments necessary.  Trust me you want to do this now before the stars are added.  Now back to the stars!  I cut out 6″ of twine for the larger stars and 18″ for the smaller ones, but make this your own, keeping 6″ as a minimum.


Once you have them all stung through (broaden the hole on the little stars if need be), tie them off where you would like them to meet the rope.  Don’t tie them too close to the star because you want it to dangle.  For the larger stars I tied them off roughly in the middle and for the smaller stars I tied them off closer to the loose ends so they would hang farther down.

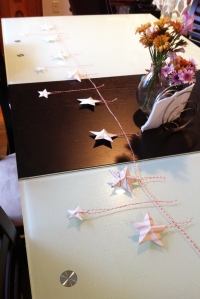
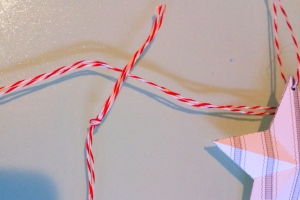
Now take your long length of twine down and lay it out on a table or the floor.  Take your stars and space them out along your twine.

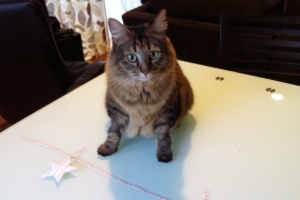
Now keep an eye on your helper.  They might steal one of your cute stars or try to run off with the string entirely.  SO very helpful!

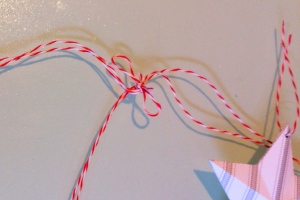
Now once your helper is wrangled, and your stars are arranged as you like them it’s time to tie them off!

Finish with a little bow or just a knot, it’s up to you!  Once you’re done tying them all to the twine you can hang and enjoy your beautiful work!

A Thanksgiving Treat: Pumpkin Dinner Rolls

I wanted to post this earlier today, but I have been a baking machine!  Seriously, I have put my Kitchenaid through its paces today.  Right now I have a salt crust dough settling, challah dough rising, and cookie dough chilling.  Yum!  Not to mention piles of bread chucks drying out for the stuffing tomorrow.

Anyways, yesterday I did a trail run of these Pumpkin Dinner Rolls for my book club (aka dinner club) and they were a huge hit!

While I got several requests for the recipe, these bad boys can be made using your favorite dinner roll recipe.  Heck, did you buy unbaked dinner rolls from the store?  You could fancy them up in a jiffy!

Simply roll your dough into small balls, flatten a bit, and cut 8 slices into them being careful not to cut the center.  Lay them out on a greased or lined baking sheet and using your pinky poke a hole in the centers.  Let them rise for another 20 minutes or so and re-poke the centers with your pinky.  Brush with egg wash and bake as your recipe directs.  Once removed from the oven brush them with butter to make them shiny!  Now don’t forget the stems.  Place a sliced pecan into the centers and viola pumpkin shaped dinner rolls!

These were 2 year-old tested and approved by the way!  The little boy at dinner last night used the “stem” as a handle and happily munched away.  He ate more of that roll then he did anything else on his plate. 😀

Looking for gorgeous step-by-step pictures, I got the directions here.   The recipe for the actual pumpkin rolls (yes they have pumpkin in them) are here.  While these were good, I opted to make tomorrow’s batch from Challah which can be found here.

Happy Thanksgiving to ALL!!!